
How to change your Name and Description on your Project Zomboid Server

Last updated 08 Jun 2025

Need a game server?

Spin one up fast with our feature-rich panel and seriously low prices.

Changing your Project Zomboid server name and description is a fantastic way to maek your server stand out. This guide will show you how to change these settings.

1 Login to the Kinetic Panel & Stop the server.

2 Go to the File Manager.
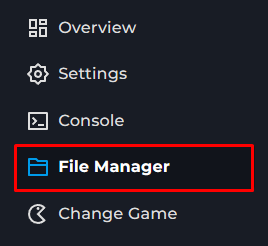
File Manager

3 Navigate through the following files **.cache (It may also be called Zomboid) > Server > Your Server Name.ini.

File Manager

notice
Your servers ini file name will be what you called your server on the Settings page.

4 You will now want to look for PublicName= and PublicDescription=

5 From there, you can edit these to your liking.

File Manager

6 After you are done editing the file, you can save it, then start your Project Zomboid server!

That is how you edit your Project Zomboid Servers name and description.

Display and navigation

Accessibility options

Personalise how Kinetic Hosting looks and how you move around it. Your choices are saved on this device.

Press Ctrl+K to search. When link hints are enabled, hold Shift to label every visible link and control.

High-contrast dark theme

Use black and dark backgrounds with white text and stronger borders throughout the site.

Keyboard link hints

Hold Shift to show a temporary key on every visible link and control. Keep holding Shift and type a label to activate it.

Keyboard navigation

Ctrl+K opens site search. When link hints are enabled, hold Shift to label every visible page link, menu item, order control and location. Keep Shift held while typing the displayed label, or release Shift to close the labels.

Search Kinetic Hosting

Search site pages, game servers, knowledgebase articles, blog posts, FAQs and modpacks.

Enter at least two characters to search the site.

↑↓ Select · Enter Open · Esc CloseCtrl+K