How to enable txAdmin on your FiveM Server!
Last updated 07 Jun 2025
Need a game server?
Spin one up fast with our feature-rich panel and seriously low prices.
txAdmin is a tool that you can use for your FiveM server to add custom models, have administrator permissions and other moderation features in your FiveM Server. This guide will show you the steps to get your txAdmin account created and running on your server!
FiveM Server License.
First we will need to get a FiveM License, then later on we will be gathering our Steam Web API Key, we will break this guide up into parts.
1 Head to the Keymaster FiveM Website & sign into your Cfx.re account, If you do not have one, you will need to create one.
2 Once you are logged in, you will want to select the New server button on the left hand side.

3 You will now want to Register a new server, you will want to give the Display name something unique & click the Generate button.

4 Your unique server key will be generated, Do not share this key with anyone. However, you will want to copy the Key for this portion of the guide.

5 Go to the Kinetic Panel and go to your FiveM server.
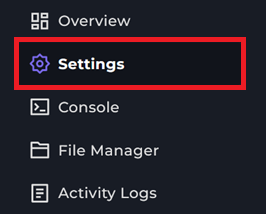
6 Head to the Settings Page.
7 You will want to paste in your FiveM License key within the FiveM License box.

Getting the Steam Web API Key
Now that we have the FiveM License out of the way, let's guide you on how to get your Steam Web API Key.
1 Head to the Steam API Key Website
2 You will want to give your server a Domain Name, It's best to make this secure and something you can remember.

3 The page should now redirect to where you can view your API Key, from there you can copy the key.

4 Go to the Kinetic Panel and go to your FiveM server.
5 Head to the Settings Page.
6 You will want to paste the Web API Key within the Steam Web API Key box.

From there, you should have your API key set!
FiveM Server Version.
This portion of the guide will be going through on how to set a FiveM version on your server, this will also be the version of txAdmin your server will be running.
1 Head to the Settings Page.
2 You will see a box labeled FiveM Version From there, you will want to put in your preferred FiveM version.

3 Now enable the txAdmin swith and you should be all set in this area for now.

Web Control Panel
When using txAdmin, you have the ability to use the control panel in your browser to better manage your server, this part of the guide will be giving you the information needed for the basics of your FiveM server.
1 You'll want to start your server.

2 When the server is turning online go to the Console page, you should see a message stating All ready! Please access: with your txAdmin URL and your PIN to register your Master account.

3 You'll now want to put in the Pin you see on your Console page to create your txAdmin master account & select "Link Account".
4 You will be brought to an Authorization page to link your Server with your Cfx.re account, then you'll create your backup password.
5 Once that is completed, you will be directed to some steps to get your server fully ready to go, we will be covering the basic txAdmin setup in this section.
6 You will be on the Step 1, you can click Next to proceed.

7 Here you will want to give your server a name, this can be what you would like.

8 Now, select the Deployment Type for your server, in this guide, we'll be covering the basics using the Popular Recipes option.

9 You will now want to select the CFX Default Option.

If you are looking to use qbCore Framework, you can follow the guide below
10 Click Save for the Data Location, unless you would like for the txData to be stored somewhere else on your server.

11 All you need to do now is click Go to Recipe Deployer and you should be forwarded to another screen.

12 Here you will want to click Next

13 You will want to get the License Key that you've put on the Settings Page and click Run Recipe.

14 From there, you will be on Step 3 of this page, you will just want to click "Next" to proceed.

15 This will be the final setup page for the Setup Page, you can configure your server.cfg to your liking here. However, we'll be leaving it default.

All Set
You should now be redirected to the main page for the txAdmin control panel, from there you can interact with your server as normal.