How to setup Autowipe on your Rust Server
Last updated 04 Jun 2026
Need a game server?
Spin one up fast with our feature-rich panel and seriously low prices.
How to setup Autowipe on your Rust Server
Login to your Kinetic Panel
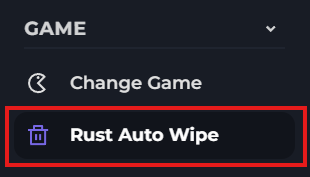
On the left side of the panel, click "Rust Auto Wipe"
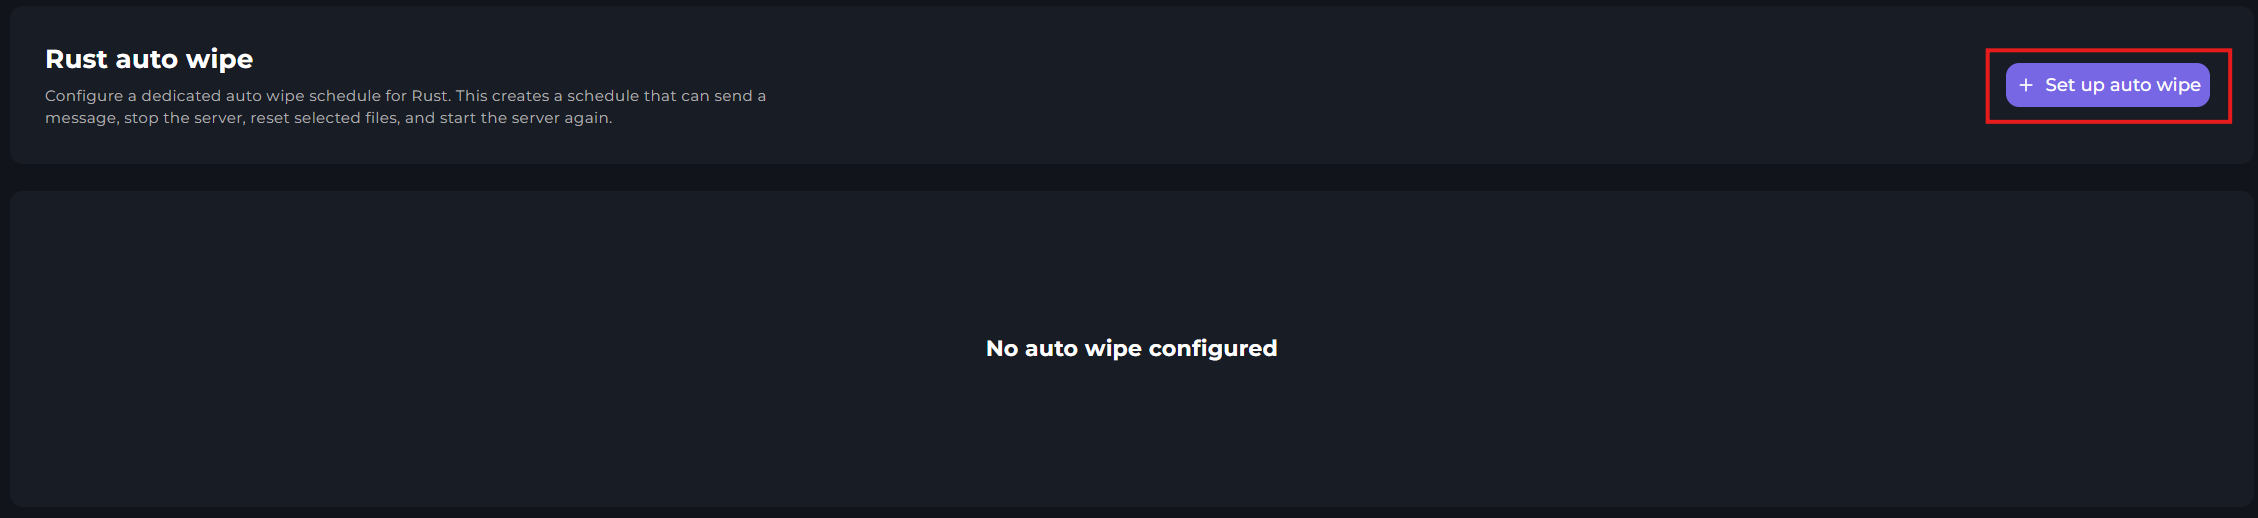
On the top right of the Auto Wipe menu, click "Set up auto wipe".
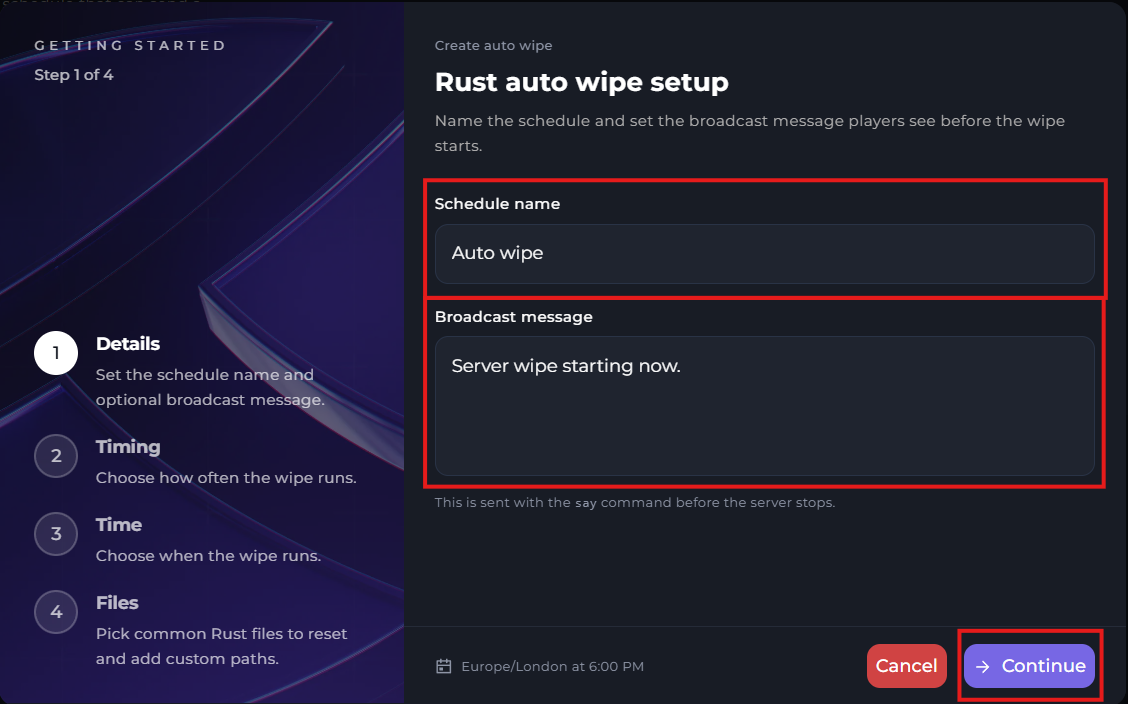
On the first step of the setup, you will need to input the game and broadcast message of the Auto wipe. Once you've set your changes, click "Continue".
On the second step of the setup, you will need to choose the schedule for your auto wipe. This can either be daily, monthly, cron format, selected days, or multiple times a day.
For the purpose of this guide, we will be selecting "Selected Days".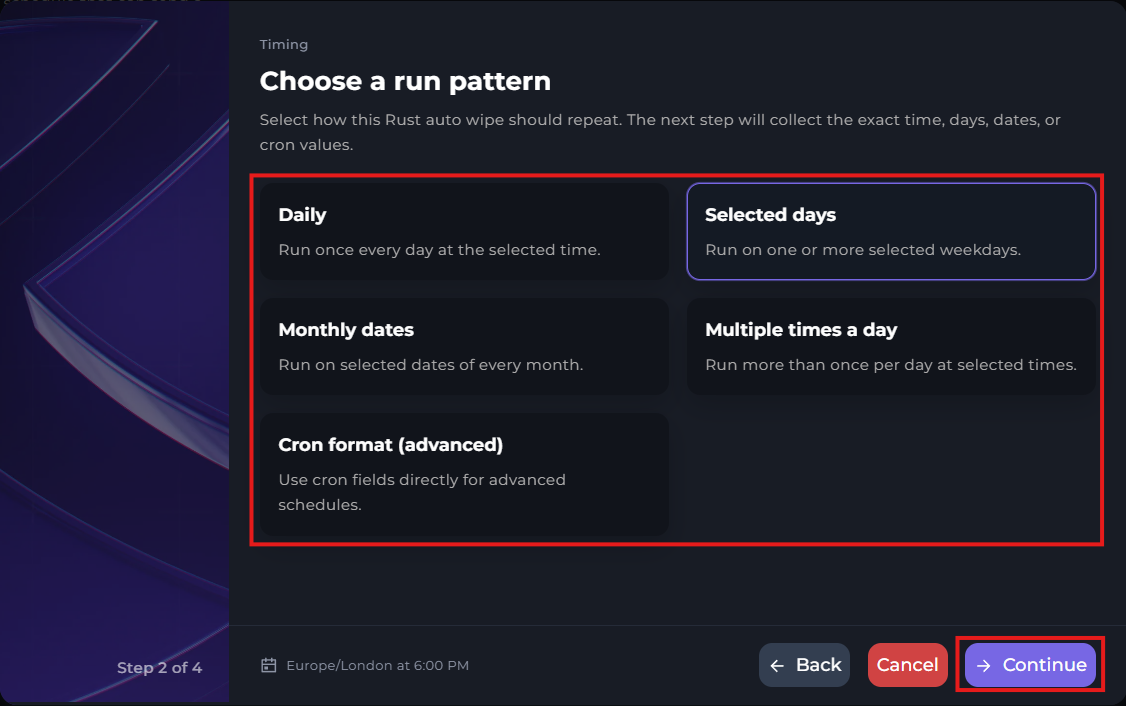
On the third step of the setup, you will need to choose what time you'd like to auto wipe to happen. You can also select the timezone.
If you chose an option such as "Daily", then you won't see the option to select the days. This happens when you choose "Selected Days".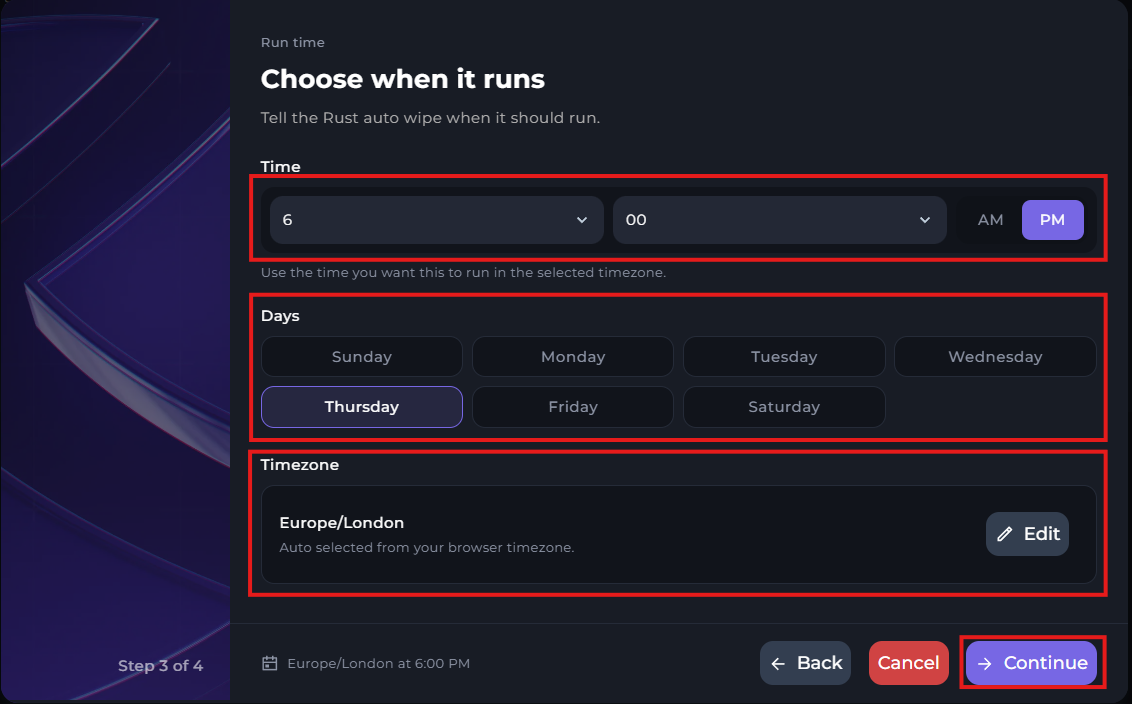
On the fourth and final step of the setup, you will need to input the name of your Rust Identity Folder. By default, it will be "my_server_identity". However, if you've changed the name, then you will need to change this accordingly.
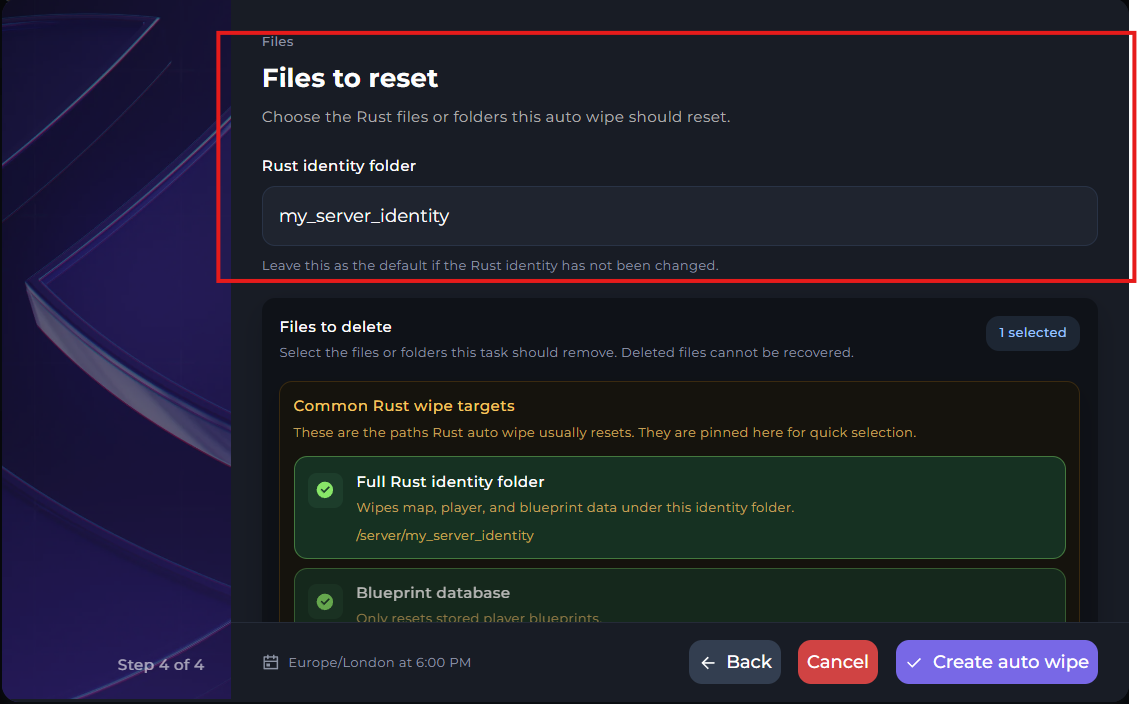
Below, you will need to select the files you wish to wipe on the auto wipe. If you wish to do a regular wipe, then keep this setting the same.
Once you've finished making your changes, click "Create Autowipe".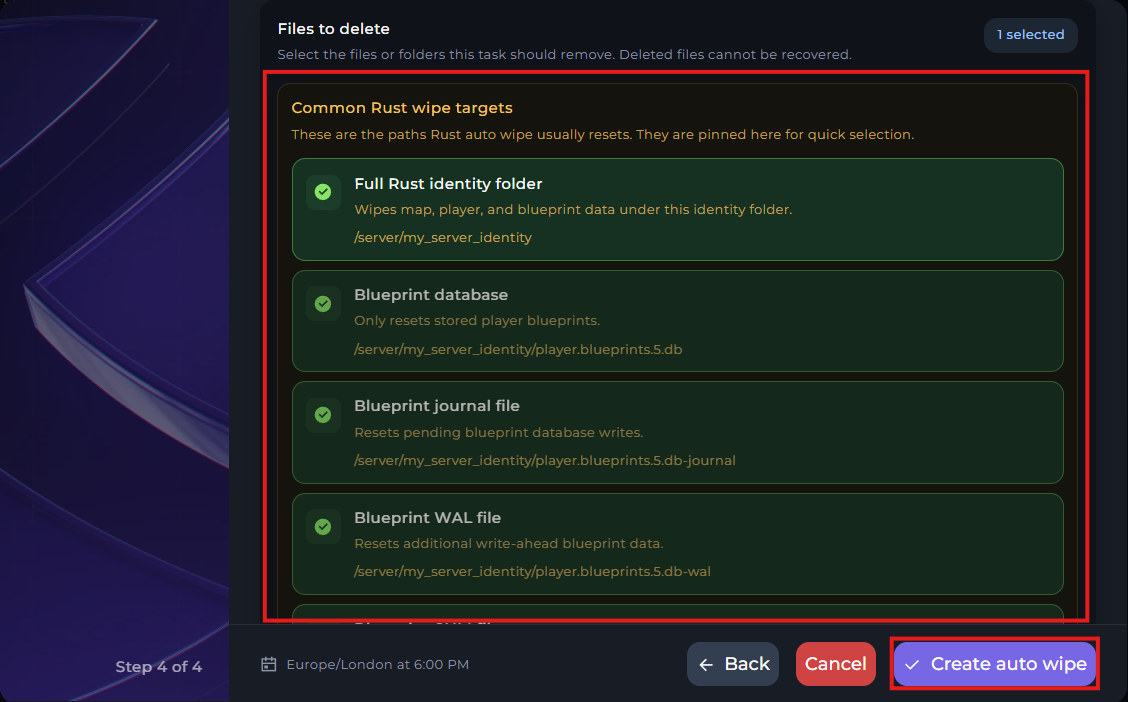
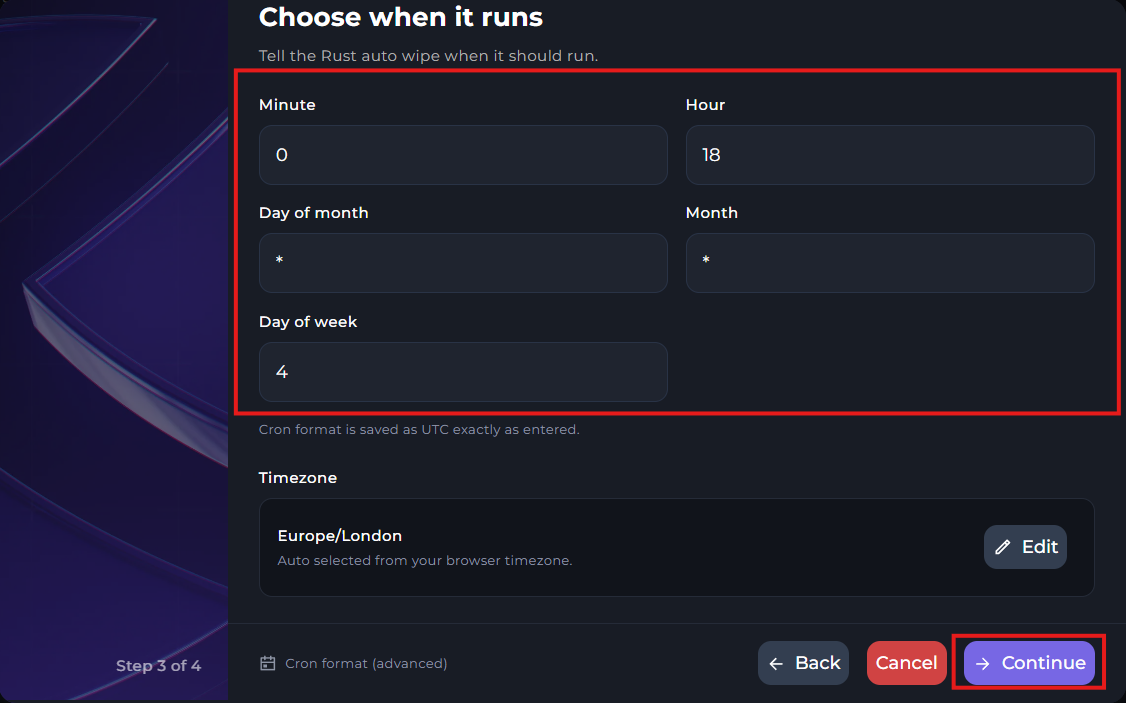
Cron Format
Cron format is a more advanced way to setup your schedules for the auto wipe. While it's more complicated, it also has to ability to run your schedules at more specific times to suit your needs.
Keep in mind, the time format for these settings are in 24-hour time.
A useful tool for timezone conversions are sites such as WorldTimeBuddy. Where you can select different timezones to look at and scan across a line to see the time between timezones.
If you use a "*", it means it will run at every moment of the selected option. For example, if you were to put a "*" on minutes, then it will run every minute.
The character , can be used to list multiple times for the schedule to run. For example, if you want the schedule to run on the 6th and 12th hours of the day, you can set the hours input box to 6,12.
The character / can be used to specify every other unit of time to run the schedule. The unit set on the right side of / is where the steps start, and the left side is the size of the steps. For example, to run a schedule every 30 minutes between the 0-59 minutes of the hour, you can use 0/30, or you can just set */30 to run every 30th minutes dependent on the hour the schedule will run.
The character - can be used to specify a range of units to run the schedule at. For example, if you want to have a schedule run every day of the month between the 7th and 12th day, you can set the days of the month input box to 7-12.
For a full example, say we want to run a schedule every 5 minutes at 6am on every Tuesday every 2 months, we will want to set the schedule to the following:
Minute: */5 | Hour: 6 | Day (Month): * | Month: */2 | Day (Week): 2
If you are having trouble understanding the syntax of the cron time format. Crontab.guru is a useful site that can be used to get a plain English version of the cron setting. For example, setting the input box to */5 6 * */2 2 will give the output of "At every 5th minute past hour 6 on Tuesday in every 2nd month."