How To Install Dynmap On A Minecraft Server
Last updated 08 Feb 2026
Need a game server?
Spin one up fast with our feature-rich panel and seriously low prices.
First, we will need to get the Version of Dynmap your server will need. You can download Dynmap on Modrinth.
Next, make sure you know the loader your server is running. Whether this be Paper/Spigot/Bukkit/Forge/Fabric or another one of your choice. You can install one of those from our Version Installer
Installing Dynmap via Quick Setup
Instead of having to go through so much, you will also be able to use our quick setup feature to instantly install and setup Dynmap.
Login to your Kinetic Panel
Stop your server.
-1767383729764.png)
Go to the Quick Setup menu.
-1770580128361.png)
In the Quick Setup menu, you can select the dynmap dropdown, and then select the version you'd like to install. Then, click the install button. Make sure not to exit the server tab while Dynmap is installing.
noticeIn order for Dynmap to be installed, you'd need to have a suitable mod loader installed on your server. For the purpose of this guide, we'll be using Fabric.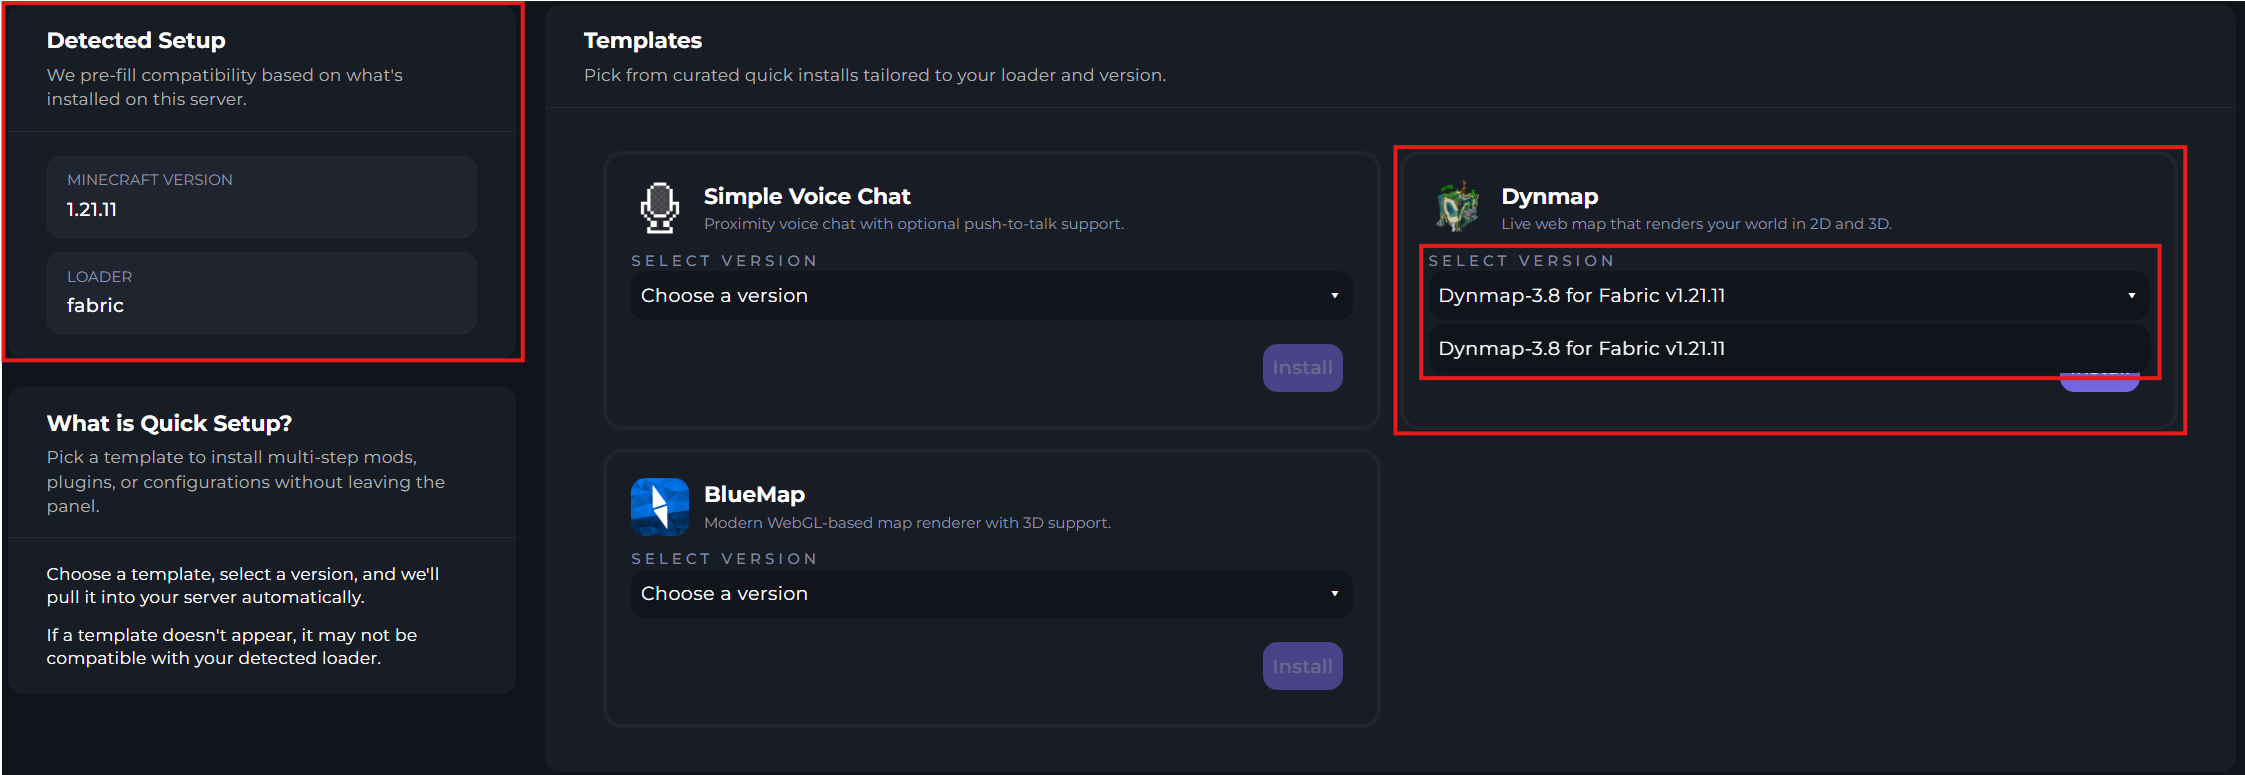
That's all there is to it! You can now start your server.
-1767462125511.png)
Setting up Dynmap
1 Login to the Kinetic Panel & stop your server.
2 Head to the File Manager.
-1770311095747.png)
3 We will be using the Plugin version Dynmap for this guide. However, if you are using the Mod version, you can put the Jar you downloaded in the mods folder.
4 Now start your server once so all of the correct configuration files for Dynmap can load correctly.
5 Head to the Network & Ports category on the left hand side.
-1770314405199.png)
6 You will now click on the "Open Port" button.
-1767636907514.png)
7 The new port should be opened, you will copy this port. You can also give it a Note so you know for later.

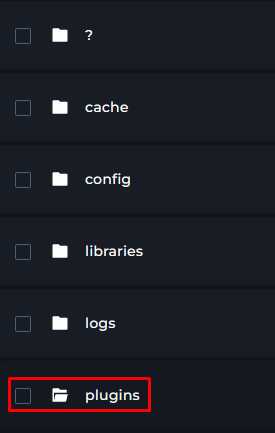
8 Now, head to the File Manager.
-1770486606909.png)
9 Open up the Plugins Folder & Look for the dynmap folder.
-1767636321627.png)
-1770577566815.png)
10 You will now open the configuration.txt file.
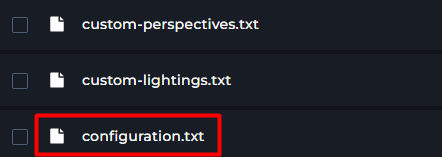
11 look for the line called "webserver-port:", You will place the copied port on that line.

12 You should be able to start your server & dynmap should be working correctly.
Viewing The Map
You can now view the map at your IP and the port you set. For example, if your IP is 127.0.0.1 and the port is 4444. You can go to http:127.0.0.1:4444 on your web-browser to view the map.
If you would like you domain to have https or a domain. You'll need to setup a reverse proxy. You can find out how to do that here.
Linking to a Database
Using a Database for your Dynmap server can help prevent your servers disk-usuage being used as quickly, This portion of the article will show you how to correctly link your Dynmap to a Database. Make sure to stop your server before making any changes.
1 Head to the Database Manager on the Kinetic Panel.
-1770577668707.png)
2 Click on New Database
-1770577721155.png)
If you already have a database, you shouldn't need to make another.
3 Give your database a name, we will be calling it "Dynmap"
-1770577919681.png)
4 Now click on View Icon next to the Database & a popup should open.
5 We recommend opening a new browser tab for easier use to copy the correct information.
6 Now, head to the File Manager.
7 Open up the Plugins Folder & Look for the dynmap folder.
If you are running Forge, Fabric or another loader, the correct configuration file will be in the Config or the World folder.
8 You will now open the configuration.txt file.

9 You will look for the "storage" part of this file. You will see Type, Hostname, Port, Database, Userid & Password

10 Remove the #'s infront of the Types above.

11 Now, on your Database that you created copy Endpoint and put it inside of the hostname box & remove the port at the end of it.

12 For the port you removed, you will place this in the port category.

13 Now, copy the Username from the database and put it in the userid category.

14 Copy the password from the database and put it inside of the password category.

From there, your Dynmap should be connected to a database.