How To Setup and Use Schedules
Last updated 07 Dec 2025
Need a game server?
Spin one up fast with our feature-rich panel and seriously low prices.
How To Setup and Use Schedules
What are Schedules?
Schedules are a powerful tool that allows you to automatically run actions on your server. This could be a backup, restart, or a command. We support two different types of creating a schedule, the Simple mode & the Advanced mode.
Preset Mode
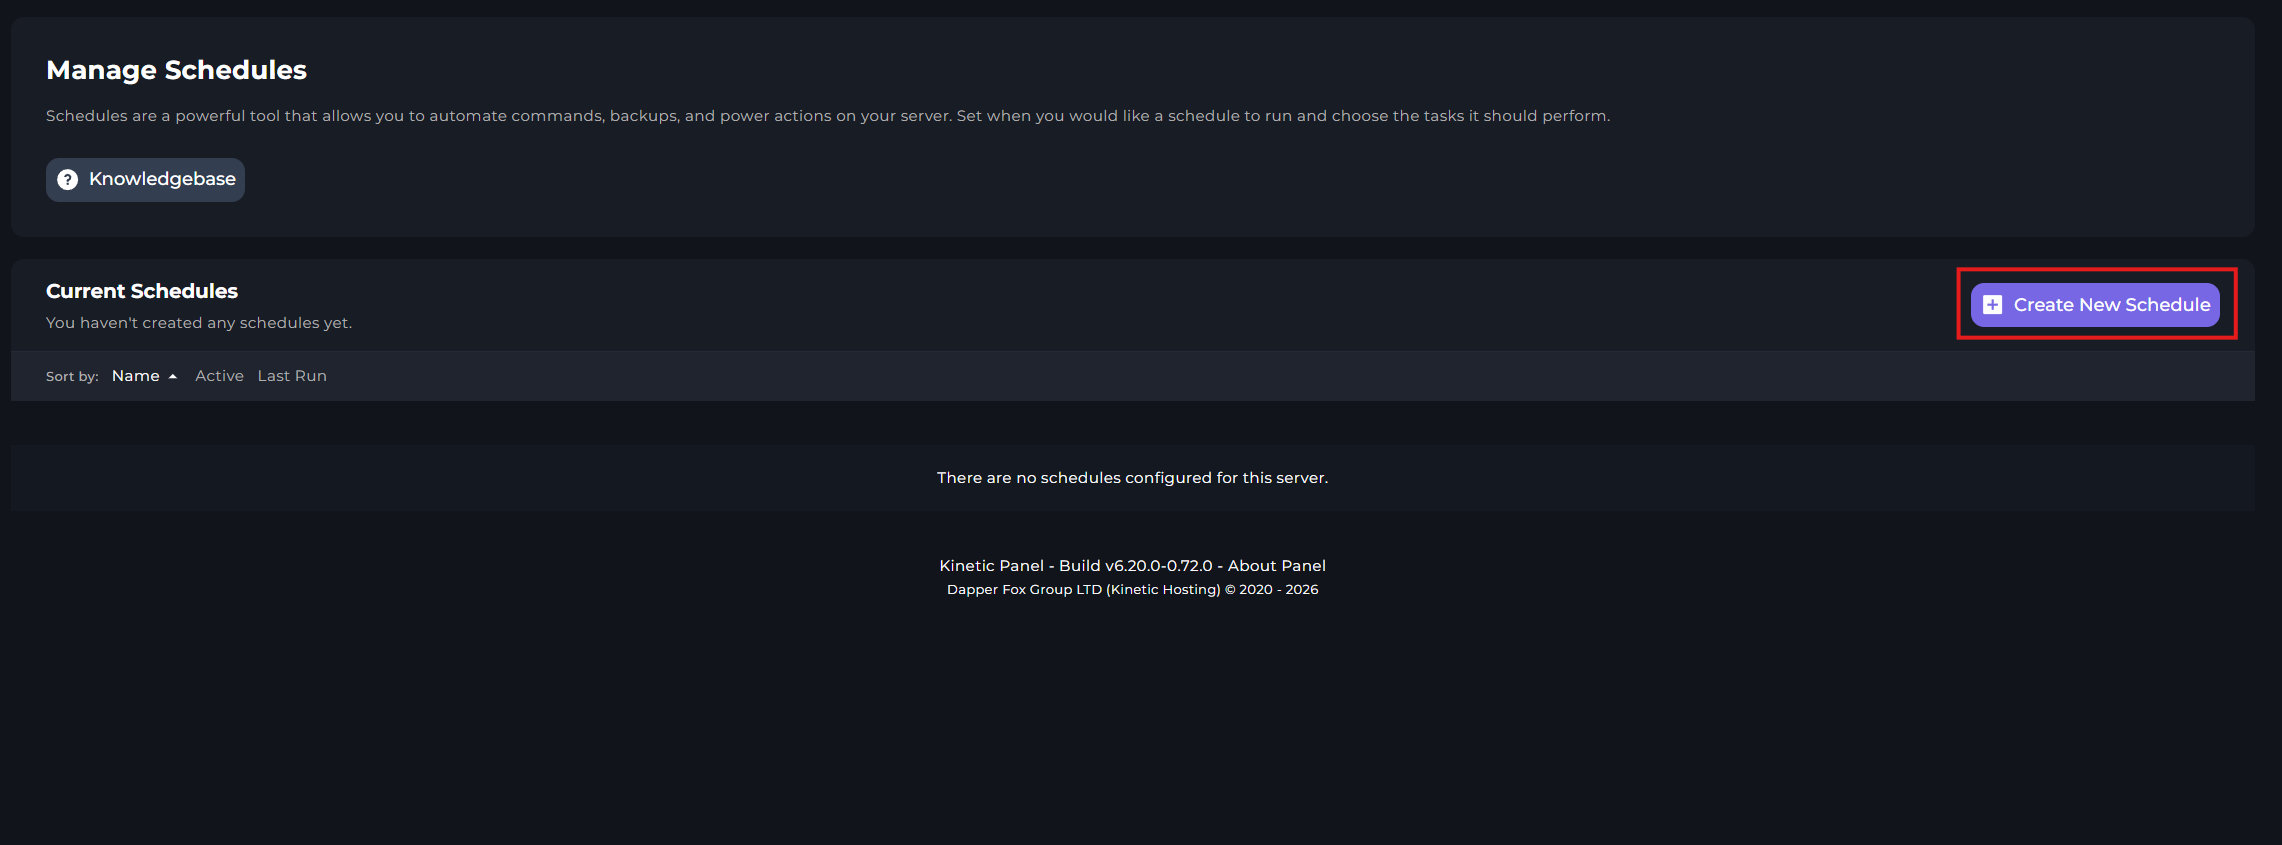
Login to your Kinetic Panel
On the left side of your panel, click "Schedules".

On the right side of the Schedule Manager, click "Create Schedule".
You'll then be met with this menu. This is the first step on creating your schedule. Here, you will enter the name of your Schedule, and for the purpose of this part of the guide, we will be choosing "Use Preset".
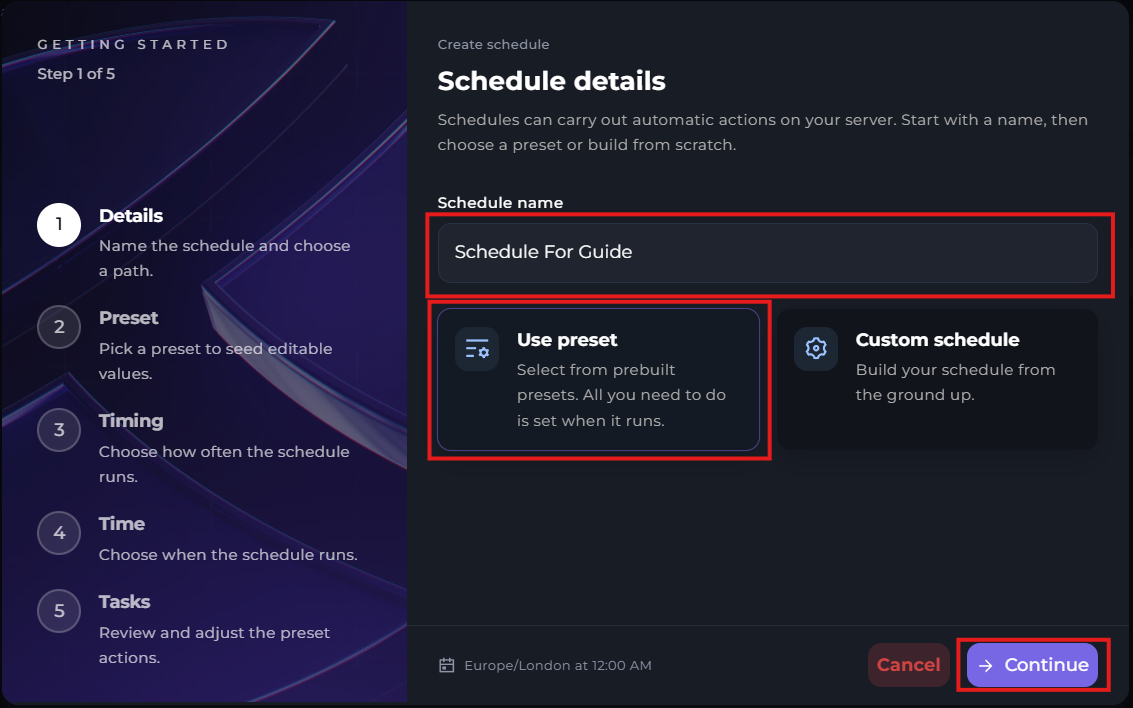
On the second step, you will see two presents. Daily restart, and daily backup.
For the purpose of this guide, we will be choosing "Daily restart". But feel free to select "Daily Backup" if that's what it is you want to do.
On this step, you can choose a run pattern. For example, you could select the option to have the schedule run multiple times a day, on selected days, monthly dates, or daily.
For the purpose of this guide, we'll be choosing "Daily".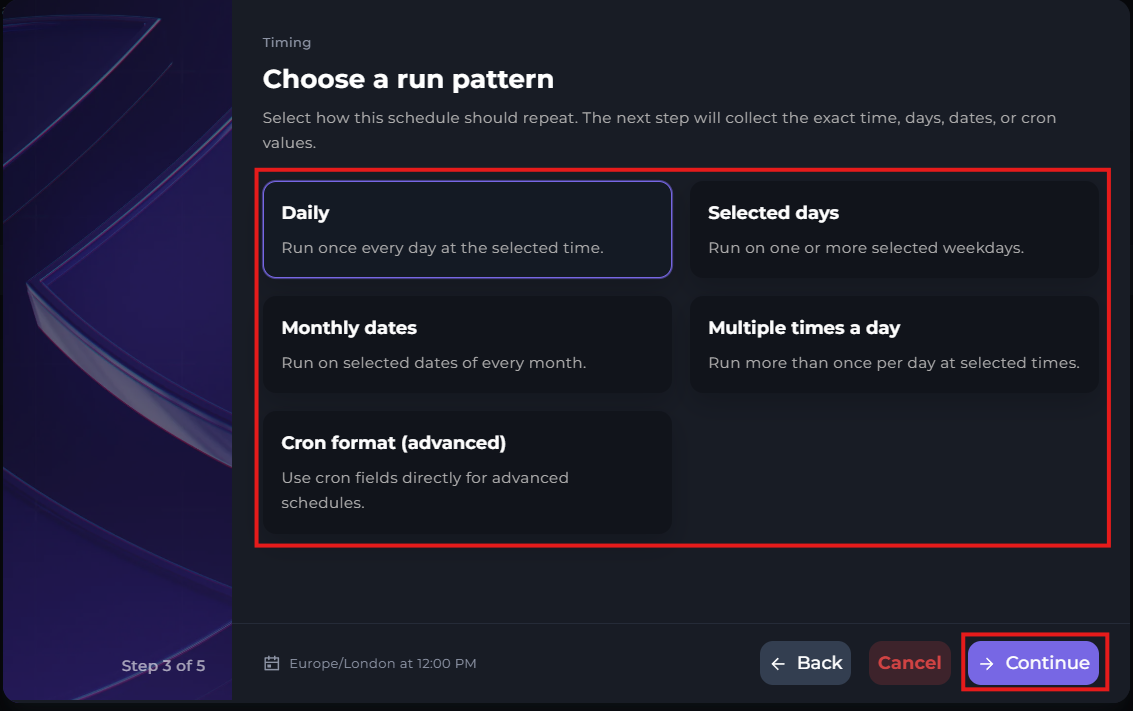
On the next step, you will first need to select what time you want the schedule to run. By default, it's set to 12AM. You can also change the time zone to suit your needs.
There are two other boxes where you can select the option to only run the schedule is the server is online. And, you can also select the option to have the schedule deactivated when created.
Once you've set your settings, click Continue.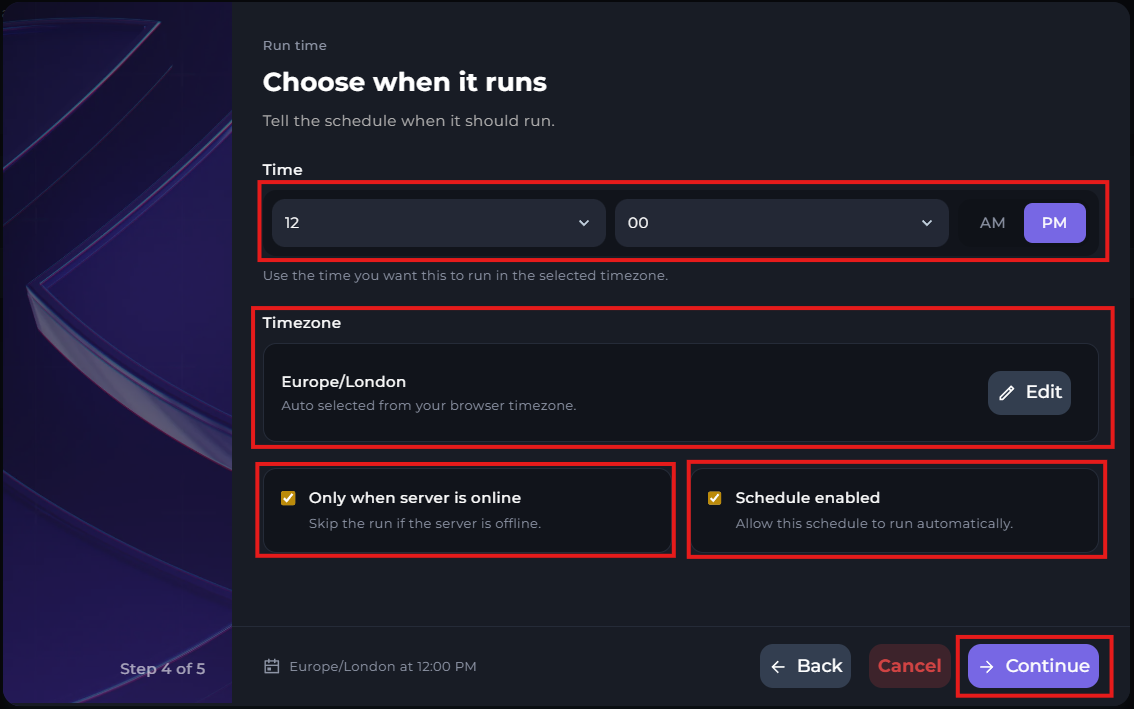
On the next step, you can choose whether or not you've like to add extra tasks to your schedule. This doesn't have to be done, but sometimes you might want to add tasks.
For example, perhaps you're setting up a restart schedule, but you want the server to send a message in chat to let everyone know that the server will restart.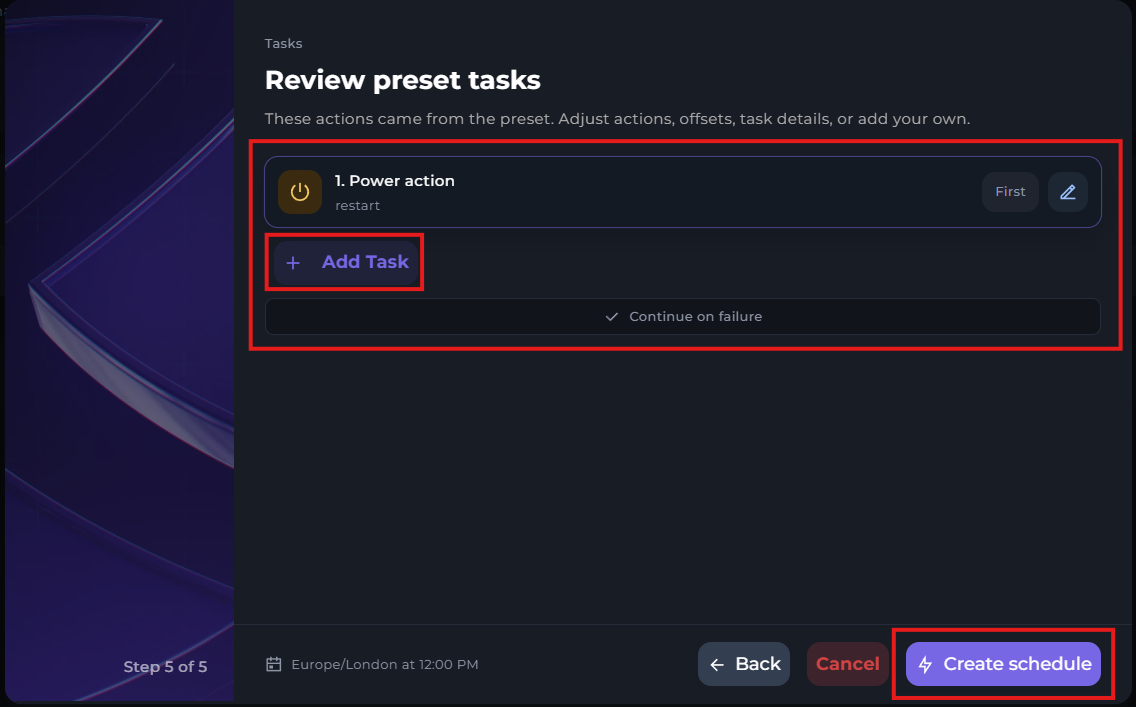
As you can see below, after adding a task, we have multiple options. First, you will need to define what type of task this is. To do that, click the yellow edit button.
You will then be asked whether you'll like to task to be a command, power action, create backup, or delete files.
Once you've select the action, you then need to set a timer offset if you wish to do so.
A timer offset will delay the action by a certain amount of seconds after the task before it has complete.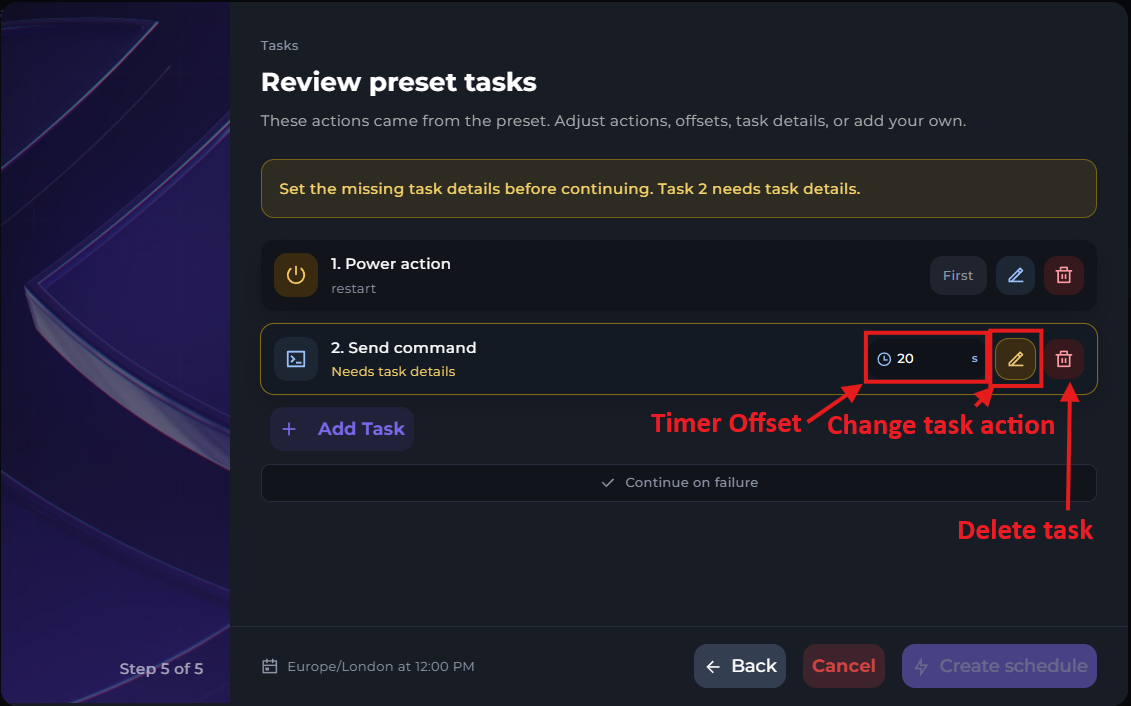
Once you've created your schedule, you can confirm whether or not the schedule has activated by seeing it on the schedules menu.

Advanced mode
Login to your Kinetic Panel
Go to "Schedules" on the left side of the panel.
In the schedule manager menu, click "Create Schedule"
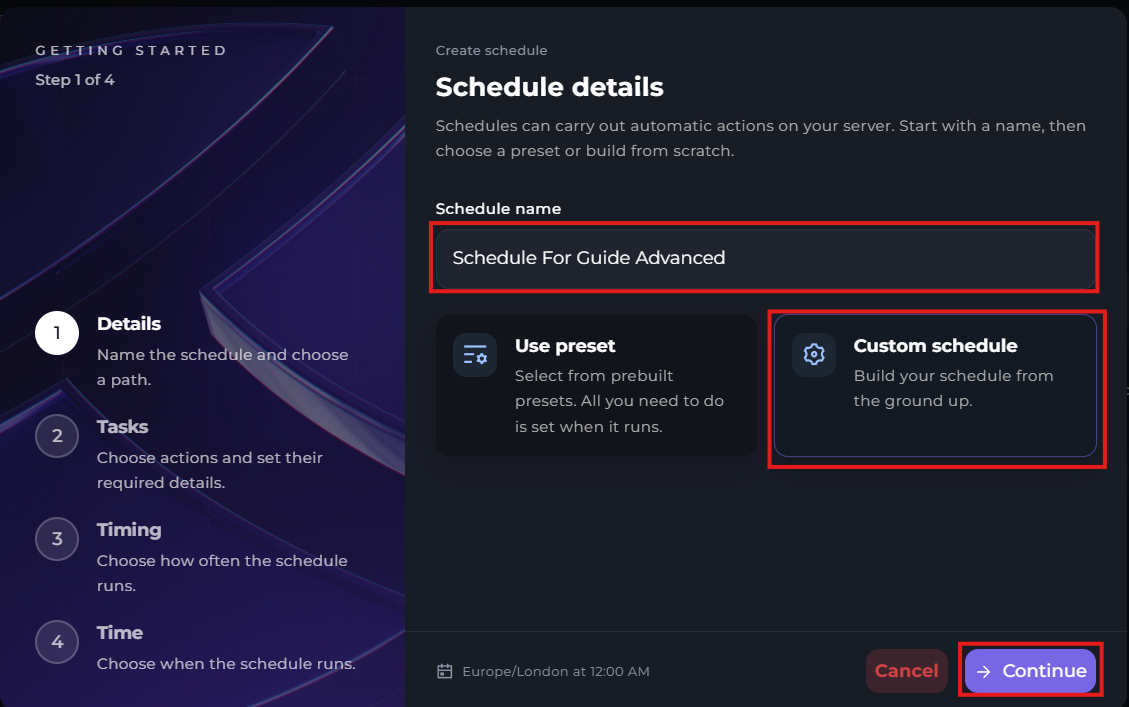
On the first step, select "Custom Schedule", set a name, and click "Continue".
On step two, you can set your schedule tasks. You can add, remove, and edit tasks and their actions there.
On the next step, you'll find a "Cron Format" option for your schedule times. This is optional of course, but it's useful if you want your schedule to run at very specific times and days.

In the Cron Format menu, you will be met with this menu. You can set the schedule to run at very specific times. The day on the month, the month, the year, the minute, and so on.
Keep in mind, the time format for these settings are in 24-hour time.
A useful tool for timezone conversions are sites such as WorldTimeBuddy. Where you can select different timezones to look at and scan across a line to see the time between timezones.
If you use a "*", it means it will run at every moment of the selected option. For example, if you were to put a "*" on minutes, then it will run every minute.
The character,can be used to list multiple times for the schedule to run. For example, if you want the schedule to run on the 6th and 12th hours of the day, you can set the hours input box to6,12.
The character/can be used to specify every other unit of time to run the schedule. The unit set on the right side of/is where the steps start, and the left side is the size of the steps. For example, to run a schedule every 30 minutes between the 0-59 minutes of the hour, you can use0/30, or you can just set*/30to run every 30th minutes dependent on the hour the schedule will run.
The character-can be used to specify a range of units to run the schedule at. For example, if you want to have a schedule run every day of the month between the 7th and 12th day, you can set the days of the month input box to7-12.
For a full example, say we want to run a schedule every 5 minutes at 6am on every Tuesday every 2 months, we will want to set the schedule to the following:Minute:
*/5| Hour:6| Day (Month):*| Month:*/2| Day (Week):2
If you are having trouble understanding the syntax of the cron time format. Crontab.guru is a useful site that can be used to get a plain English version of the cron setting. For example, setting the input box to*/5 6 * */2 2will give the output of"At every 5th minute past hour 6 on Tuesday in every 2nd month."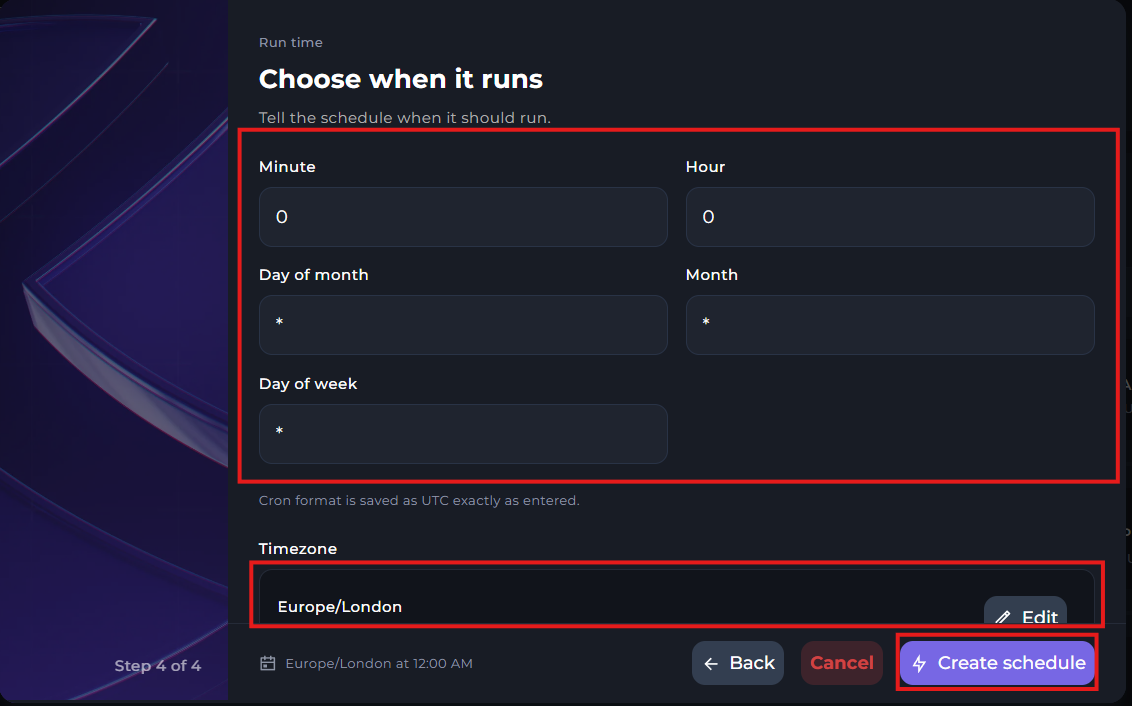
If the schedule was successfully created, you will see it appear in your schedule menu.
Editing schedules
Lets say you want to change one of your schedules, or perhaps you made a mistake. No problem! You'll be able to edit your schedules.
Go to "Schedules" on the left side of the panel.
Click "Edit" beside the schedule you wish to edit.

In the edit menu, you'll see multiple settings you can change. You can change the task order, add tasks, remove tasks, or edit the entire schedule.
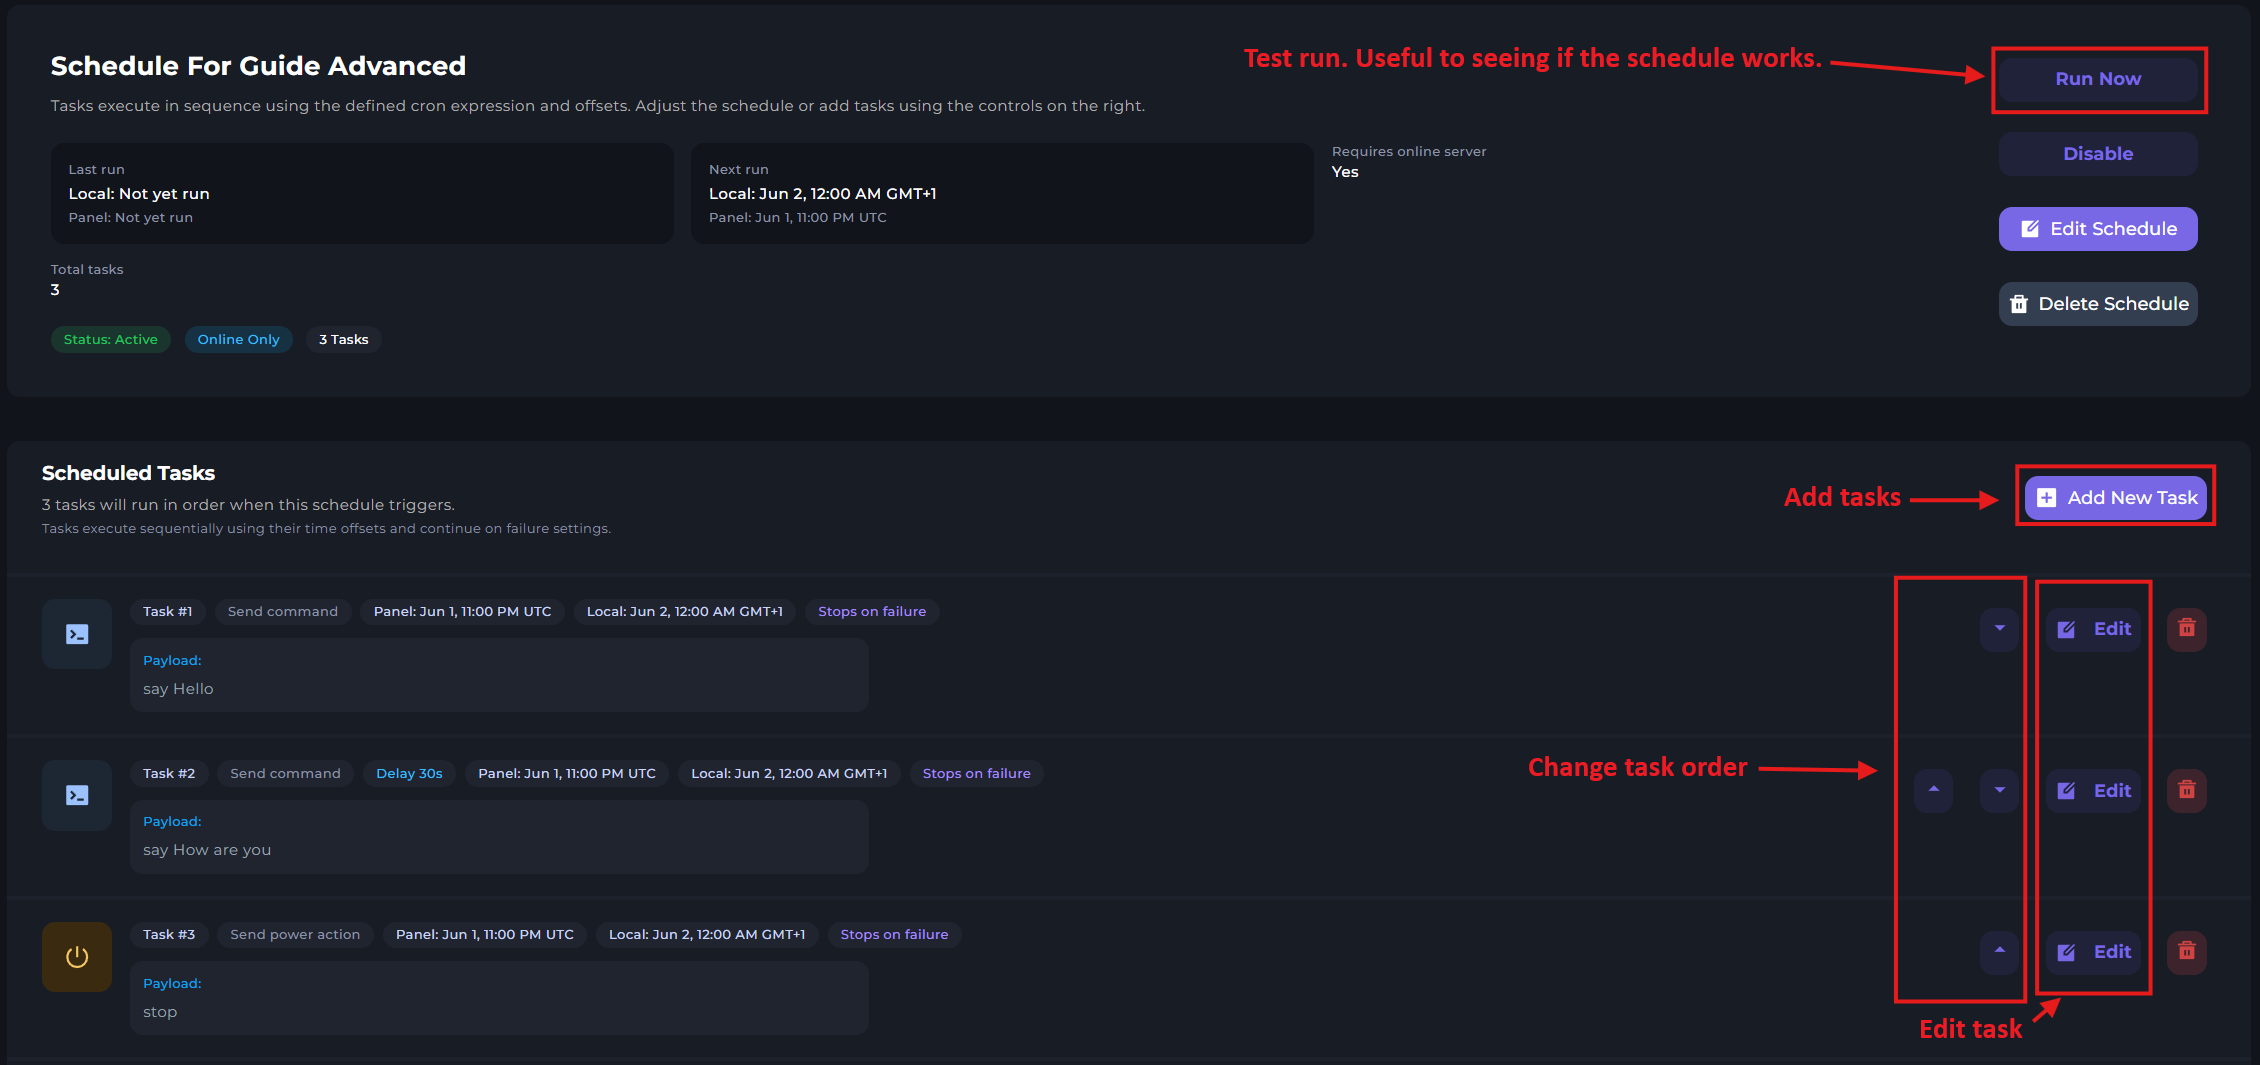
Any changes to tasks make will save automatically, unless you edit the schedule itself, then you'd need to save your changes within it's menu.