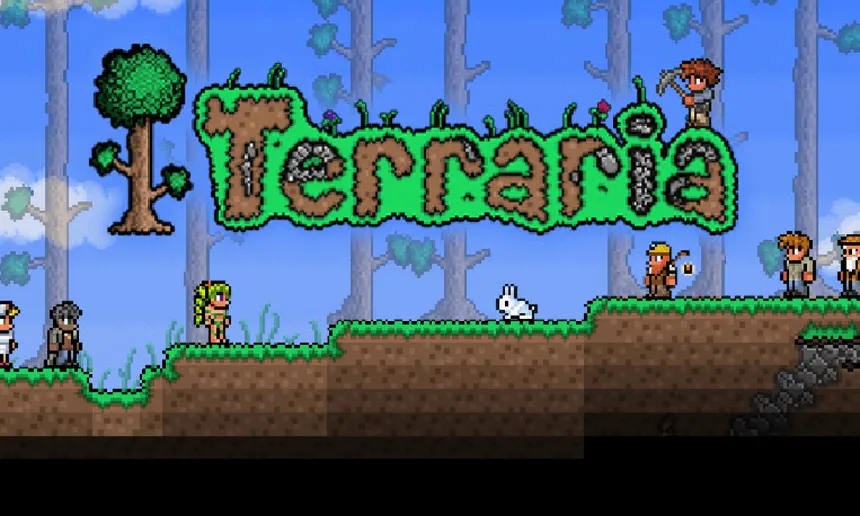
How to Play Terraria: A Beginner's Guide
Posted by Fen | 21 October 2025
Learning how to play Terraria can feel like being dropped in the deep end. You spawn in a huge, randomly generated world with only a few basic tools, and the game doesn’t really tell you what to do next. It can be a bit much at first, but once things click, Terraria becomes one of those games that eats up hours of your evening without you even noticing.
And don’t worry, you don’t need to learn everything on day 1.
Terraria runs on a simple loop: gather materials → craft better gear → build yourself a base → take on bosses → then do it all again with tougher challenges.
Every cycle makes you stronger, and before long, you’ll go from hiding from the first slime you see to taking down giants like the Eye of Cthulhu and eventually the Moon Lord.
Ready to learn how? Let’s get started:
Setting Up Your Game
Before you ever swing your first sword, Terraria asks you to make a few choices that shape how your adventure begins:
Game Modes & Character Creation
The first major decision is whether to go single-player or Multiplayer. If you’re new to the game, solo play is the smoother way to get used to things. Once you’ve got the hang of it, teaming up with friends makes the game way more fun.
Then comes character setup. You can tweak how your character looks - hair, clothes, colours - but what really matters is the difficulty setting:
Journey Mode - A chilled option where you can research items, duplicate them, and even mess around with things like time and weather.
Classic (Softcore) - The go-to for beginners. When you die, you only drop some coins and keep the rest of your gear.
Mediumcore - A step-up. Death means losing all your items.Hardcore – One life. If you die, your character and all their progress is gone for good.
Since you’re reading this, it’s likely your first time, so stick with Classic/Softcore for now.
Creating Your First World
Once your character is ready, the next step is to make a world. Terraria generates a fresh map each time, so no two runs feel the same.
When creating a world, you’ll pick a few settings:
World Size - Choose between Small, Medium, or Large.
Beginner tip: go with Medium. Small worlds run out of resources too quickly, while Large worlds can be overwhelming to explore.
Difficulty - Classic, Expert, or Master.
Beginner tip: stick to Classic. It’s balanced for learning the game without bosses wiping you out too early.
World Evil - Either Corruption (purple biome) or crimson (red biome). Both spread over time, changing your world.
Beginner tip: if you get Corruption, it’s a little easier to handle early on. Crimson is still fine, just a bit more dangerous.
Once you lock these in, the world will generate and drop you in at the spawn point. This is where you’ll always return when you die, so don’t build directly on it - leave some room to move around.
Now, here’s what you should prioritise during your first day:
Your First Day in Terraria
Step 1: Gather Wood
The moment you spawn, use your copper axe to chop down nearby trees. Wood is your lifeline in the early game - you’ll use it for weapons, torches, furniture, and your first house.
Aim for around 200 pieces so you’re set for the night.
Step 2: Build a Work Bench
Open your crafting menu and use some of that wood to make a Work Bench. Place it down near the spawn. This unlocks better recipes like the wooden sword (a big upgrade over your copper shortsword) and the wooden bow, which pairs well with stone arrows.
Step 3: Craft Better Weapons and Tools
Upgrade your starting gear while you’ve got daylight.
A wooden sword will swing properly instead of just poking forward, making combat easier.
A bow and arrows give you a safe ranged option, especially useful against zombies at night.
Step 4: Build a Shelter Before Nightfall
Enemies get much stronger after dark, so use your wood to throw together a small house.
You’ll need:
Four walls and a roof
Background walls (crafted from wood) to seal it properly
A door or two for access
Torches for light (made with gel from slimes + wood)
A table and chair so the Guide NPC can move in
That should do it for the night; more on why NPCs are important in a little bit. Right now, it's about surviving your first night with our last tip:
Step 5: Stay Safe Through the Night
Once the sun sets, stay inside your shelter. Keep the doors closed to block zombies and demon eyes.
If you made a bow, you can fire through gaps or from the roof to pick enemies off safely. Otherwise, wait until morning to explore again.
Even in the morning, you’re still going to have enemies to fight, so here are some quick fighting tips to keep you alive:
Quick Fighting Tips:
Pay attention to enemy movement patterns - timing your swings or shots is usually more effective than spamming attacks.
Terrain can also tip the fight in your favour: flat ground makes enemies easier to control, while platforms, walls, or even a quick trench outside your base can slow them down.
Always carry mushrooms or healing potions in your hot bar so you can recover in a pinch.
And remember - survival is more important than chasing kills.
Time For Mining and Exploring
Now the first day is over and done with, it’s time to start with the early game progression via mining & exploration.
Look for surface caves if you can - they save time and often connect to deeper tunnels, where you’re going to find much better loot.
Stay Prepared
Always bring:
Torches - made from gel and wood, they light your path and mark explored routes.
Wooden Platforms - let you climb out of shafts without ropes.
Rope or Recall Potions - handy escape tools if you dig too deep too fast.
What to Look For
Ores - Smelt them into bars at a furnace to craft stronger tools, armour, and weapons.
Heart Crystals - Found underground, these increase your maximum health.
Pots & Chests - Break or open them for bombs, potions, rope, and sometimes rare weapons.
Watch Out for Hazards
Falling blocks, water pools, and stronger underground enemies make mining dangerous. Place torches as you go, carve safe escape routes, and avoid dropping straight down without preparation.
The deeper you dig, the greater the risk - but also the greater the reward.
Expanding Into Your First Base
By now, you’ve survived the first night with a small shelter, and you’ve managed to farm a few resources after some exploration - but that tiny box you call home won’t cut it for long.
As you explore, gather resources, and unlock new crafting stations, you’ll need more space to store items, protect NPCs, and organise your world.
What Makes a Good Starter Base
Room for NPCs: Each NPC needs their own valid room (enclosed walls, light, chair, table, and a door). Start stacking or branching extra rooms onto your shelter so you can attract merchants, nurses, and more.
Storage Space: Chests pile up quickly. Dedicate part of your base for organised storage - ores, blocks, weapons, and crafting materials.
Crafting Hub: Place your Work Bench, Furnace, Anvil, and Loom close together. Standing in one spot should let you access most recipes without running around.
Defences: Build walls, traps, or elevated platforms to keep enemies out, especially during Blood Moons or Goblin Invasions.
Building Tips for Beginners
Start with wood and stone - easy to gather and replace later.
Leave enough room for upgrades (new crafting stations and furniture take up space).
Place torches liberally. A well-lit base stops enemies from spawning inside.
Keep your spawn point inside your base by crafting a bed when possible.
Your first base doesn’t need to look pretty: function comes first. Once you’re stable with resources and NPCs, you can focus on aesthetics and larger builds.
Why NPCs are So Important for Progression
NPCs (non-playable characters) are one of the biggest upgrades you’ll unlock after surviving those first few nights. They move into rooms you build in your base, and each one brings something that makes progression smoother.
Take the Merchant, for example - he sells ropes, healing potions, and basic gear, saving you time farming or crafting.
The Nurse can heal you instantly, which becomes a lifesaver before and after boss fights.
Later on, the Arms Dealer, Goblin Tinkerer, and Wizard all unlock new mechanics, weapons, and upgrades that keep your character advancing.
The more rooms you build, the more NPCs you can attract.
A good beginner tip: Always have a few empty, valid rooms ready. That way, when you meet the conditions for a new NPC (like finding a gun for the Arms Dealer), they can move in straight away.
What Comes Next
By now, you’ve made it through the first nights, mined some ores, and built a base to stay safe. The next step is pushing further underground to collect metals like copper, iron or lead, silver or tungsten, and eventually gold or platinum.
Smelt these into bars at a furnace, then use an anvil to upgrade your armour and weapons so you can stand up to stronger enemies.
Mining and building will only take you so far, though…
Bossing Milestones
To unlock new areas and keep progressing, you’ll need to take down bosses. Beating them is what really pushes the game forward - fights get tougher, faster, and far more exciting.
Here are the first milestones to focus on with your new gear:
Milestone 0: King Slime
Before you face the Eye of Cthulhu, you might encounter King Slime. He can appear randomly during a Slime Rain event or be summoned with a Slime Crown (made from gold/platinum bars and gel at a Demon/Crimson altar).
King Slime is slower and easier to manage than later bosses, but still tests your ability to dodge and deal steady damage. Beating him drops helpful loot like the Slime Hook and Ninja Armour pieces, which can give you a nice boost before taking on tougher fights.
Milestone 1: The Eye of Cthulhu
The Eye of Cthulhu is often the first boss beginners face.
It usually spawns on its own once you’ve built up some health and gear, but you can summon it with a Suspicious Looking Eye crafted from lenses.
A bow with flaming or frost burn arrows works well here, along with at least silver or tungsten armour.
Be sure to fight it in a flat, open space so you can dodge easily.
Milestone 2: The Eater of Worlds or Brain of Cthulhu
Which boss you get depends on your world’s evil biome - Corruption gives you the Eater of Worlds, while Crimson spawns the Brain of Cthulhu.
Both drop materials you’ll need to move deeper into progression. Break Shadow Orbs or Crimson Hearts underground to trigger the fight.
Stronger weapons (like a gold or platinum broadsword, or a bow with plenty of arrows) and armour are recommended before you head in.
Milestone 3: Heading Toward the Dungeon
Once you’ve beaten the early bosses, your sights turn to Skeletron at the entrance of the Dungeon.
Taking it down unlocks access to powerful loot inside. You’ll want solid armour, a ranged weapon with lots of ammo, and enough potions to keep you alive.
Beating Skeletron is usually the step that makes you feel ready for the bigger challenges ahead within the Dungeon.
Survival’s Better With Stability
You’ve learned how to mine, build, and take down your first bosses - but none of that matters if lag, crashes, or disconnects ruin the run.
That’s where Kinetic Hosting comes in:
Low-latency servers built for smooth, lag-free worlds.
Instant setup so you can get playing in seconds.
Full tModLoader & mod support with one-click installs.
Flexible resources - play solo, or bring in your whole crew.
Free automated backups to protect your progress.
24/7 human support that actually cares.
Build massive bases, explore deeper, and face Terraria’s hardest bosses with confidence - all on a stable, high-performance server.
Start Your Own Server
Looking for a game server? Get set up in a few moments. With our one-click installers and simple packages.